Search This Blog

Saturday, 29 October 2016

Motion Blur: Tutor Review

 
Motion blur was the subject we learnt in the workshop today. Motion blur is an affect which occurs when a traditional camera’s shutter does not capture a fast moving subject completely causing a noticeable blur within the shot. Despite Mayas perfect mathematical shot construction, this does not produce an effective product because it is not the style of a traditional film.
Therefore we were taught the rendering options regarding motion blur and how to apply this to our animations.

During the 3D workshop I received critical feedback about my work from my tutor. He went through my animation several times and gave me several points about my animation which I could improve upon. I will amend these improvements, these included:

-Points upon the Graph Editor
-Spacing
-Secondary Action
-Overlapping Action
-Blinks
I intend to add motion blur to my work because I want my animation to have a theatrical aesthetic, which will be appealing to the audience. Otherwise a perfect render where every frame will be clear will not be as appealing. In addition to these settings I will correct my work by amending these improvements made by my tutor.


CP2 Narrative Map Beginnings

 
As part of the CP2 we have to produce a narrative map of a story of our specialism. This map must represent both space and time and how the characters move and interact within their space. We have been given the opportunity to produce a creative piece of work with freedom of choice of how we present our work.
I have chosen to produce an image of a map of my chosen film. This way the audience can differentiate between the different locations throughout the whole film and visualise the narrative of the film.
 
I started by creating a short list of potential films I could choose from, I started with the film: The Road To Eldarado. I watched the film, then started to produce a map of the narrative. I took notes about locations, characters and events which are all associated with each other to refer to while I created the map.


As I created the map, I began to face problems. I used Photoshop and the piece did not turn out as intended, therefore I moved onto another film.
I chose the film: The Nightmare Before Christmas because I saw the potential of events associated with locations and I enjoy film. Again I took notes as I watched the film to refer to as I produced the map.
 

This time I started with an initial layout sketch of the world in pencil which provided a guide. Using reference Ive maintained the style of Tim Burton.

I will continue the work of this map by filling in the worlds with line and colour in Photoshop/ Illustrator. I will also add a feature where there will be an additional later which will cover all of the world in snow and decorations to represent the time passing in the film. Events will also be separated layers which will appear and disappear to represent the passing of time within the narrative as the characters move within the space.
Thursday, 27 October 2016

Sketch-A-Day: 1

New Group, First Post. 

25th October 2016

I have created a new group on Facebook to encourage people to draw more. The challenge is draw at least one sketch a day and people can choose to post these in the group to both see their development through practice, constructive criticism and support from others. 

This started as a personal challenge for myself as I feel that I do not draw enough to retain what I have learnt. I believe with practice my drawing skills will improve and I wanted to incorporate other people into this too. I may not be the only person feeling this way. 

Therefore this was my first sketch I posted in the group:


This is a drawing of myself at a computer which I was earlier that day trying to figure out the graph editors within Maya. 
I feel this is a good start as I wanted to show the frustration, tiredness and concentration I was experiencing earlier that day. I used the sketchbook app on my tablet to make this. 

Tuesday, 25 October 2016

Animation Process and Practice: Graph Editor

Maya: 3D Work

25th October 2016

Continued work on the rig has both been challenging and enjoyable. I have learnt a great deal about Maya, the graph editor and the rig itself. I have applied the principles of animation I have learnt to the performance to make it as effective as possible. I intend to create a performance, which is both entertaining and believable. I have taken reference from a number of sources including my own LAV.
Now I have changed the tangents within the graph editor to splines, therefore the rig now moves with in-betweens; creating smooth movement. However, this does not mean it is complete because these movements are not correct. As these movements are balanced and smooth; which makes the movements seem unnatural. From observations I have made; I have found that living creates accelerate and decelerate which is the principle of easing in and out of an action. Therefore, I have had to go through the graph editor adjusting the anchors and tangents to the appropriate locations and shapes.
Every part of the body has different rates of speed and these are all adjusted through the graph editor. An example of this could be the eyes are set to ‘stepped’ whereas the arms are set to ‘splines’. Because the eyes dart around whereas the arms flow with readable in-betweens.


I have had to change some extremes because the spacing was not correct, this caused the model to move rather quickly. Therefore I had to move the position of the arms so that the arm had less distance to travel between two extremes; causing the arm move smoothly.
I have also done work on head accents making sure they are correct during the line: “A long slender neck”. As I intend to have accents on the head on: “a L-ong S-lender N-e-ck”. This will make his head be up on the capitals and bob down on the rest causing him to nod. I have produced a X-sheet on this dialogue to track the frames. I am still finding this a challenge though.


I have had to do a lot of work with the arms including the shoulders, elbows and wrists because they often become twisted between two extremes. Therefore I have had to go through and adjust all of these errors which has been time consuming.
I must continue my work with the graph editor as I have much more to learn and a lot more to edit.

Notes from 3D Workshop (21/10/16)


Monday, 17 October 2016

CP2 Narrative: Week 2


14th October 2016

Imagined Worlds


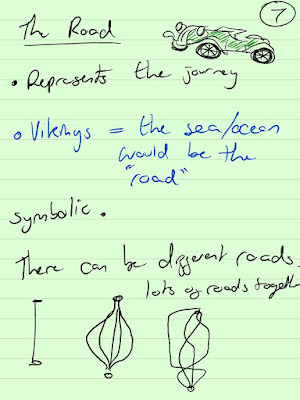
Notes from my second lecture, in the third week. This is because I missed the second lecture due to medical reasons. 


Notes from Seminar:


CP2 Narrative: Week 1

30th September 2016

Introductory Lecture


These are my notes from the first Lecture of CP2: Narrative. 


Seminar Notes: